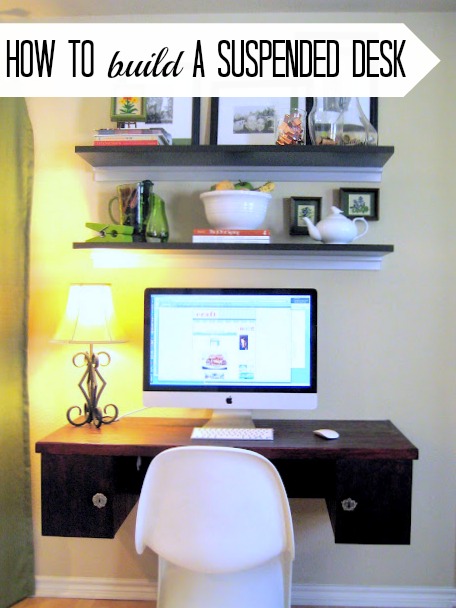
We built a suspended desk that hangs from our wall. Yep, we’re officially nuts. Here’s the original plan, desk dilemma, part 1 and part 3, of the desk building soap opera Today we’re tackling part 2, the sanding, routing, and wire drama surrounding the desk.
Want to learn how to build your own suspended desk? Check out- Part 1.

The trim was slightly higher than the desk. So, we begin to sand…by we, I mean the BF! He sanded and sanded and sanded…


Now it is time to the route the trim. He used his favorite Christmas present ever… a Dremel! Probably not the best tool to route with, but it did get the job done. The Dremel was very useful for slicing through a few finishing nails that went awkwardly into the trim pieces. Here are the Dremel routing bits we used:

We routed a test piece of ply wood. The Dremel liked the solid oak a lot better.

We tested it on the real thing… I guess “test” isn’t the right word. We went for it…


I am so happy we decided to do the routed edge… it makes a more pleasant place for me to rest my forearms and type up blog posts. It also gives the desk a more finished/ professional look.


This is where the wires will live:

This is what we used to give the holes a finished look:

Now on to part 3 the installation of tiny doors for the cubbies, and a few more coats of stain and we will be done-skies.

Comments & Reviews
I have been loving suspended workspaces lately! This one is fantastic, especially since you have the cubby area.
xo,
Sena
How have I never seen this before!? IN LOVE! You are so talented! This is a genius idea for a desk!
xoXOxo
Jenn @ Peas & Crayons
Such a great idea for that space. Can't wait to see it when it when its completed!
Looks great so far! By the way, I love the matted frames above the desk! :0)
Oh, and I wanted to let you know I gave you an award on my blog. You can check it out here:
http://framefanatic.blogspot.com/2011/01/stylish-blogger-award.html
love this! can't wait til my hubby is back from deployment so I can force him to help me do this 🙂